EMIS இல் மாணவர்களின் புகைப்படங்களை 200 க்கு 200 PIXEL மற்றும் 30KB அளவுக்கு மாற்றுவதற்கான செயல்முறைகள்
கீழ் உள்ள படத்தை காண படத்தின் மீது CLICK செய்யவும்
- Emis மற்றும் Emis original என்ற இரு folder உருவாக்கவும்
- Copy your photos in emis folder
1. Photo shop application I (short cut) jpwf;fTk;
2.
File ஐ click செய்து open click செய்யவும்

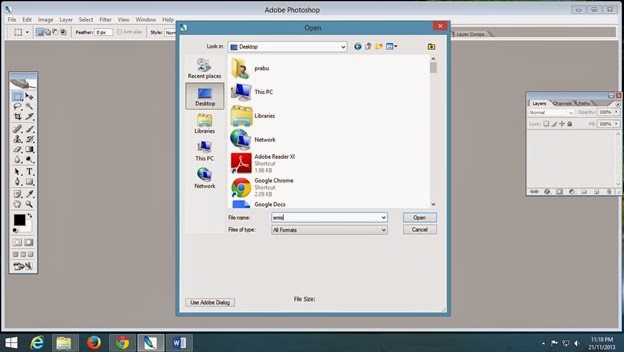
3.click desktop and type file name emis and click
open butten

4.Click your photo and click open butten

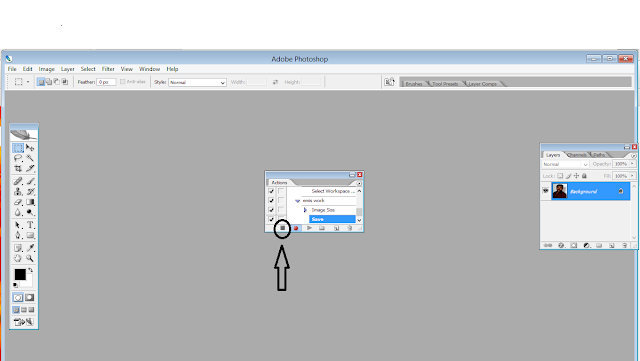
5.Windows மெனுவில் Actions என்பதை தேர்ந்தெடுக்கவும்.

6.கீழே ஐந்தாவதாக வரும் create new action என்பதை தேர்ந்தெடுக்கவும்.

7. New action க்கு "emis work" எனப் பெயர் கொடுக்கவும்.

8.பின்பு Record பட்டனை அழுத்தவும்

9.click image butten

10.click image size


12.
resolution 200 type செய்யவும்
13. width and hight 200 type செய்யவும்
14. click ok butten
15. Go file and click save for web
 16.select jpeg and select high and click save


17.select "emis original" folder and click save button
18.
see your resize photo in "emis original" folder
19. Stop playing /recording என்பதை கிளிக் செய்து உங்களுடைய action நிறுத்தவும்.
20. File மெனுவில் Automate இல் Batch பட்டனை கிளிக் செய்யவும்

19. Stop playing /recording என்பதை கிளிக் செய்து உங்களுடைய action நிறுத்தவும்.
20. File மெனுவில் Automate இல் Batch பட்டனை கிளிக் செய்யவும்

21. Action இல் "emis work" என்பதை செலக்ட் செய்து உங்களுக்கு தேவையான EMIS போல்டரை செலக்ட் செய்து ok click செய்யவும்
 22. உங்கள் அனைத்து படங்களும் "emis originol" என்ற போல்டரில் மாற்ற பட்டிருக்கும்!
note :
Contact:9843139983 (prabu)

note :
check your photo size
30 kb க்கு அதிகமாக இருந்தால் steb 16 ல் image quality குறைத்து மீண்டும் மேல் உள்ள செயல் முறையை தொடங்கவும்
Contact:9843139983 (prabu)
www.learnerkey.com
Comments
Post a Comment